
A logo may look sharp and detailed on a screen, but embroidery has physical limitations that require careful planning. Fine lines, small lettering, narrow gaps, color transitions, and tiny shapes can change significantly when converted into stitches. Learning how to digitize a logo for embroidery without losing important details requires more than simply converting an image into a machine file. The design must be adjusted according to its size, fabric, stitch type, and intended embroidery application.
A properly digitized logo should preserve the visual identity of the original artwork while adapting its details to the way thread behaves on fabric. This article explains the key considerations involved in preparing a logo for embroidery while maintaining important design elements.
What Does It Mean to Digitize a Logo for Embroidery?
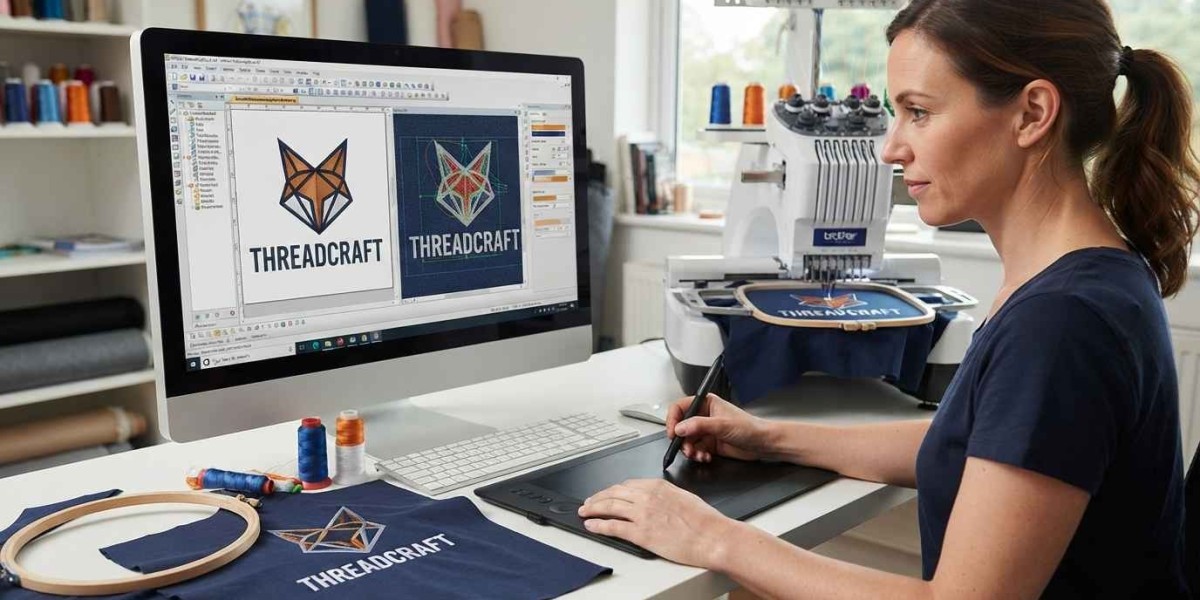
Digitizing a logo means converting artwork into a digital embroidery file that contains instructions for an embroidery machine. These instructions determine where stitches are placed, their direction, density, sequence, and other technical settings.
Unlike ordinary image files, embroidery files are built around stitches. The digitizer must decide how each part of the logo should be represented using embroidery techniques such as satin stitches, fill stitches, running stitches, or specialty effects.
The objective is not to reproduce every pixel of the original artwork. Instead, the goal is to create an embroidered version that maintains the recognizable features and proportions of the logo while working effectively on the selected material.
Why Logo Details Can Be Lost During Digitizing
Some logo elements that appear clear in digital artwork may not translate directly into embroidery.
Very thin lines may become too narrow to stitch properly. Small spaces between letters can close when thread is added. Tiny text can become difficult to read, while closely placed colors may blend visually.
Fabric movement can also affect registration. When a garment shifts slightly during stitching, small elements may not align exactly as they appear in the original artwork.
These limitations make it important to evaluate the logo before creating the final embroidery file.
Start With High-Quality Original Artwork
The quality of the source artwork affects how accurately the digitizer can interpret the logo.
Whenever possible, provide the original vector artwork, such as an AI, EPS, SVG, or suitable PDF file. Vector artwork can make curves, outlines, shapes, and proportions easier to identify.
High-resolution PNG or JPG files can also be useful when vector artwork is unavailable. However, heavily compressed images or screenshots may contain blurry edges and missing details.
Providing the best available artwork gives the digitizer a clearer reference and can reduce unnecessary reconstruction work.
Identify the Most Important Logo Elements
Not every detail in a logo has the same importance.
Before digitizing, identify the elements that must remain recognizable. These may include the company name, symbol, icon, distinctive lettering, border, or specific shape.
For example, a small decorative line may be less important than the main lettering or central symbol. If the design has to be simplified because of its embroidery size, knowing which features are essential helps guide those decisions.
The goal should be to preserve the visual information that makes the logo identifiable.
Consider the Final Embroidery Size
Size is one of the most important factors in preserving logo details.
A logo designed for a large jacket back can accommodate more detail than the same logo reduced for a small chest placement. When the design becomes smaller, fine lines and tiny text may need modification.
Before digitizing, determine the actual size at which the logo will be embroidered. Avoid digitizing at an arbitrary size and assuming that the file can be reduced later without affecting the result.
If the logo will be used in several sizes, separate versions may be more appropriate. A small version can be simplified while a larger version can retain additional details.
Simplify Details When Necessary
Simplification does not mean removing the identity of the logo. It means adapting certain elements so they can be reproduced clearly with thread.
For example, very narrow gaps may need to be widened, extremely thin outlines may need adjustment, and tiny decorative elements may need to be removed or modified.
A good digitizer makes these changes carefully rather than simplifying the entire design automatically.
The final result should remain visually consistent with the original while being suitable for embroidery.
Choose the Right Stitch Type
Different parts of a logo may require different stitch structures.
Satin stitches are commonly useful for borders, lettering, narrow shapes, and other areas where a smooth stitched surface is appropriate. Fill stitches can cover larger areas, while running stitches can represent fine lines or details where suitable.
Choosing the wrong stitch type can affect both appearance and durability. A large area filled with an unsuitable stitch structure may create excessive density, while a narrow element may require a different approach.
The digitizer should select stitch types based on the design's size, shape, fabric, and intended result.
Use Appropriate Stitch Density
Stitch density refers to how closely stitches are placed within an embroidered area.
Too much density can create excessive thread buildup, stiffness, puckering, or other production issues. Too little density can leave fabric showing through and weaken the visual appearance of the design.
Maintaining appropriate density is particularly important when preserving small logo details. A detailed design does not necessarily require more stitches everywhere. It requires thoughtful placement and distribution of stitches.
Pay Attention to Underlay
Underlay stitches provide a foundation beneath the visible embroidery. They can help stabilize the fabric and support the top stitches.
Different fabrics may require different underlay approaches. Stretchy materials, lightweight fabrics, and textured garments can behave differently during stitching.
Proper underlay can help maintain cleaner edges and improve the stability of the design, but excessive underlay can contribute to unnecessary bulk.
Plan Stitch Direction Carefully
Stitch direction affects the visual texture and shape of embroidered elements.
Changing stitch angles can help define different sections of a logo and create a cleaner appearance. Direction can also influence how light reflects from the thread surface.
For logos containing curved shapes, overlapping elements, or multiple sections, thoughtful stitch direction can help preserve the appearance of the original artwork.
Handle Small Text With Care
Small text is one of the most challenging logo elements to reproduce in embroidery.
Letters need enough space and stitch structure to remain readable. If lettering is too small, the stitches may merge or become difficult to distinguish.
Before digitizing, check the minimum practical size of the lettering. If the logo must be embroidered at a small scale, consider whether the wording can be enlarged, simplified, or omitted while keeping the main visual identity intact.
It is better to make a controlled adjustment than to produce unreadable text.
Maintain Clean Color Separation
Logo colors can become less distinct when adjacent embroidered areas are too close together.
Make sure the color boundaries are clearly defined in the digitized file. Stitch sequencing and object placement can influence how those areas meet.
If the original logo contains gradients, embroidery may require a different visual approach because thread does not reproduce digital gradients exactly. The digitizer may use color changes, stitch patterns, or other techniques to approximate the intended appearance.
Consider Fabric Before Finalizing the Design
The same logo can behave differently on different materials.
Cotton, denim, fleece, caps, jackets, performance fabrics, and stretchy garments each have different characteristics. Fabric stability and texture can affect how details appear after stitching.
For example, a design containing fine details may need more careful treatment on a stretchy shirt than on a stable woven fabric.
Providing the intended fabric or garment type before digitizing helps the digitizer make more suitable technical decisions.
Account for Stitch Pull and Push
Embroidery stitches can cause fabric and neighboring elements to shift slightly during production. This is commonly addressed through appropriate compensation and stitch planning.
Without accounting for these effects, outlines may appear thinner or shapes may become slightly distorted.
Experienced digitizing requires anticipating how the design will behave during actual stitching rather than relying solely on its appearance inside embroidery software.
Use Proper Stitch Sequencing
The order in which objects are embroidered can influence registration and overall appearance.
A thoughtful sequence can reduce unnecessary movement, help maintain alignment, and place overlapping elements in a logical order.
For logos with multiple colors and layered components, stitch sequencing becomes especially important. Poor sequencing can contribute to gaps, misalignment, or unwanted overlaps.
Avoid Unnecessary Stitching
Adding more stitches does not automatically improve detail.
Excessive stitching can increase production time, thread usage, and fabric stress. It can also make an embroidered logo unnecessarily heavy.
Instead, each stitch should serve a purpose. A skilled digitizer evaluates whether a detail can be represented effectively using the appropriate stitch structure without creating unnecessary density.
Test the Logo Before Large-Scale Production
A digital preview is useful, but it cannot always show exactly how an embroidered logo will look on fabric.
A test stitch-out can reveal issues involving small text, density, registration, stitch direction, thread colors, and fabric behavior.
For important logos or large production orders, testing can help identify adjustments before hundreds of garments are embroidered.
If the logo will be used across several materials, testing the design on the most challenging or important application can provide useful information.
Keep Different Versions for Different Applications
One embroidery file may not be ideal for every size and product.
A large jacket-back logo may retain more details, while a small cap or chest version may need simplification. Creating application-specific versions can help maintain better clarity.
This approach is particularly useful for businesses that use the same branding across uniforms, hats, jackets, bags, patches, and promotional products.
Common Mistakes That Cause Logo Details to Disappear
Several mistakes can reduce the clarity of an embroidered logo.
One common issue is digitizing without considering the final size. A detailed design may look excellent at a large scale but become unreadable when reduced.
Another problem is using excessive stitch density in an attempt to preserve every detail. This can create thread buildup instead of improving clarity.
Ignoring fabric type is another frequent mistake. A design that works well on stable fabric may need adjustments for stretchy or textured materials.
Finally, skipping a test stitch-out can allow technical problems to remain unnoticed until production has already begun.
How to Preserve Logo Quality During the Digitizing Process
The most effective approach is to treat embroidery as its own medium rather than attempting to reproduce the digital artwork stitch by stitch.
Start with accurate source artwork, determine the final size, identify essential elements, and consider the fabric and placement. Then select stitch types, density, underlay, sequencing, and compensation based on those requirements.
Reviewing the digitized design at actual size is also important. Zoomed-in software previews can make tiny details appear clearer than they will be on the finished garment.
A Practical Logo Digitizing Checklist
Before approving a logo embroidery file, check that:
- The correct artwork version was used.
- Final embroidery dimensions are accurate.
- Important lettering remains readable.
- Fine details are suitable for the selected size.
- Colors are clearly separated.
- Stitch density is appropriate.
- Stitch directions support the design.
- Fabric and placement have been considered.
- The required machine format is correct.
- A test stitch-out is reviewed when necessary.
This checklist can help identify potential issues before the design enters full production.
Conclusion
Digitizing a logo for embroidery requires careful adaptation of the original artwork to the physical characteristics of thread and fabric. The most important details should be identified early, while elements that cannot reproduce clearly at the selected size should be adjusted rather than forced into the design.
Accurate sizing, suitable stitch types, balanced density, proper underlay, stitch direction, sequencing, and fabric considerations all contribute to a more reliable embroidered result. iDigitize can support businesses and individuals that need professionally prepared embroidery files while maintaining the recognizable features of their original logos.
Frequently Asked Questions
Q1. How do I digitize a logo for embroidery without losing details?
Start with high-quality artwork, determine the final embroidery size, identify essential design elements, and adapt fine details to embroidery limitations. Proper stitch types, density, sequencing, and testing can help preserve the logo's visual identity.
Q2. Can every logo detail be reproduced in embroidery?
Not always. Extremely small details, thin lines, and tiny text may need to be simplified or adjusted because thread has physical limitations.
Q3. Should I create different embroidery files for different sizes?
In many cases, yes. A large logo can support more detail than a small logo. Separate size-specific files can provide better results across different applications.
Q4. What is the best file format for sending a logo to a digitizer?
Vector formats such as AI, EPS, SVG, or suitable PDF files are often helpful. High-resolution PNG or JPG files may also be acceptable depending on the artwork.
Q5. Why does small text become difficult in embroidery?
Small text has limited space for individual stitches. When letters are too small, stitches can merge and reduce readability.
Q6. Is a test stitch-out necessary?
It is strongly recommended for complex designs, important branding, unusual fabrics, or larger production runs. Testing can reveal issues that are difficult to identify from a digital preview alone.